In a nutshell, schema helps your business website show up in aggregated search results. Google’s Knowledge Graph and smartphone voice search are a couple of popular examples of the use of schema data. However, adding schema sounds like a daunting task if you aren’t familiar with coding.
Fortunately, WordPress plugins make it easy to add schema to your website without the need for coding.
Today, we’ll walk you through how to use the free Business Profile plugin – setting it up should only take about 15 minutes. By the time we’re done, your site will be better optimized for local business search results.

Step 1: Install the Business Profile Plugin

The Business Profile plugin simplifies the process of adding SEO-friendly schema.org markup to your business’ contact details. This helps search engines like Google catalogue your address, phone number, and opening hours. Schema helps differentiate these pieces of data from the rest of your content, so search engines can make them easier to access in results.
Setting Business Profile up is super easy. WordPress offers step-by-step directions for installing plugins here, and for full documentation, you can read the Business Profile plugin documentation.
Step 2: Choose Your Business Type
Once the plugin is installed and activated within WordPress, you must choose the most appropriate business type for your company. There are quite a few options, so it may be confusing to decide which makes the most sense.

Here are the business categories you need to know:
- Organization. The umbrella term for any organization. Use this only if your business fits no other category.
- Corporation. A business corporation.
- Educational Organization. This applies to schools, both private and public.
- Government Organization. Any organization or agency run and/or funded by the government, with the exception of schools.
- Local Business. The umbrella term for a singular business or branch. This could be an independent restaurant or the particular location of a restaurant chain. You’ll find a selection of sub-categories to narrow this down further.
- NGO. This acronym stands for Non-Governmental Organization. These are not-for-profits run independently from states and international government organizations.
- Performing Group. This could be a band, dance troupe, circus, etc.
- Sports Team. This could be a national, regional, or local team.
Choose the option that most closely aligns with your business. Doing so improves the odds that your business will be included for searches such as (for example) “sports stores near me” when a potential customer is in the neighborhood.
Step 3: Set Your Business Details
Once your business type is set, provide the rest of your business details – starting with your business address:
- Enter it into the Address text field.
- Click Retrieve map coordinates.
- Check the coordinates by clicking View map to confirm the marker is in the right place.
There are a few edge cases where Google Maps does not generate the correct coordinates, and unfortunately, Google has not (yet) provided a fix. If your address shows incorrectly on the map, click Remove map coordinates and leave it empty. Otherwise, people trying to get directions may wind up with bad directions.
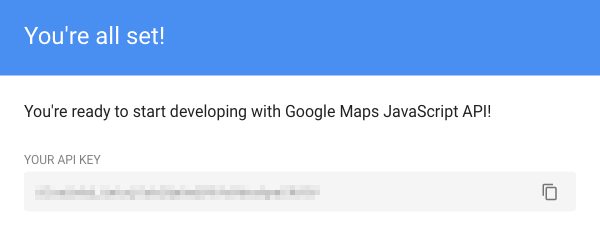
You also have the option to include a Google Map with your address. If you’d like to include this, you need to get a Google Maps API. Here’s how:
- Visit Google’s Get a Key/Authentication page.
- Click Get A Key, and follow the prompts to create a project.
- Copy your new API key.
- Go back to the Business Profile admin page in WordPress.
- Paste it into the Google Maps API Key field.
Next, add your business phone number. Follow these guidelines:
- Use a local phone number instead of a central or call center whenever possible.
- Do not use a phone number that redirects or forwards the call elsewhere.
Optionally, include a direct link to your preferred contact method: a contact page or email address. This data is displayed publicly, so we don’t recommend listing a personal email address.
Step 4: Create Opening Hours
Did you ever notice how Google sometimes shows store hours right in search results? You can benefit from this too.
[Tweet “Schema makes your business hours eligible to appear directly in search results.”]
Here’s how to set opening hours for your business:
- Click Add another opening time.
- Check your open business days.
- By default, it shows your business open as 24 hours a day. To change this, click Want to set a time slot?
- Choose your normal opening hours.
If you have variable hours, you’ll need to rinse and repeat this process for each time slot.
Let’s say your business hours are Monday to Thursday 10am–5pm, and Friday to Saturday 8am–6pm. Each separate time slot needs its own opening time as follows:
- Follow the above directions to set Monday to Thursday 10am–5pm.
- Repeat to set Friday to Saturday from 8am–6pm.

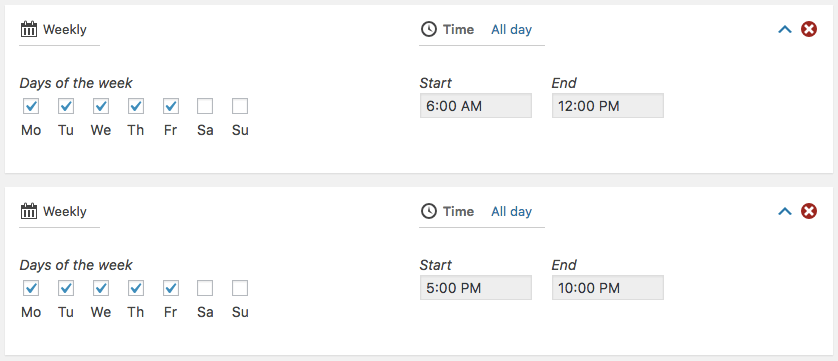
What if you are open at two different time slots in the same day? Say you are open 6am–12pm and 5pm–10pm.
- Follow the directions to set opening hours as 6am–12pm.
- Repeat with a new set to create your evening hours as 5pm–10pm.
Don’t forget to save all your changes before clicking away from the page!
Step 5: Add Your Information to Your Contact Page
Now that your back end information is set, it’s time to make it public on your site. You can either publish it to a page, like your Contact or About page, or use widgets to add it to a sidebar or footer area.
Publishing On a Page
- Choose or create the page you’d like to display your information.
- Click Edit within your WordPress admin.
- Add the [contact-card] shortcode on that page.
- Save and publish the page.
Publishing in a Widget
The Business Profile plugin comes with a preset widget that you can drag into any widget-enabled area on your theme.
- Go to Appearance > Widgets, and find the Contact Card widget on the left hand side.
- Drag the Contact Card widget into your desired location on the right hand side.
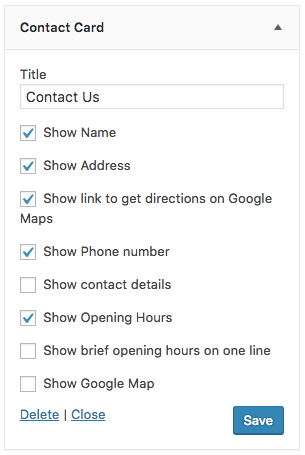
- Expand the widget and select the information you would like to be visible. Our advice is to select any information you would like to end up in search results.
- Optionally, add a widget title. This could be ‘Contact Us’ or ‘Directions’ – whatever makes most sense for you.
- Hit Save.
Congratulations! Your business information is now publicly available on your website.
Conclusion
Using schema to display your business information plays an important role in normal and voice search results. However, it can be intimidating to implement when you don’t feel comfortable with code.
Fortunately, with WordPress and the Business Profile plugin, the process is a cakewalk – all you need is to add your business information and publish it on your site.
If you have any questions or need any further help regarding adding schema to your website, please don’t hesitate to get in touch via the comments section below!